So it's time to make some buildings.


The shells of the buildings are easy enough to make. They are just sections of cardboard boxes that I cut to the desired size, duct tape together, and use an X-ACTO knife to cut out the window holes. My studio is located above two restaurants, so new cardboard boxes (art materials) are delivered daily.

Then I cut out a sheet of cardboard that is large enough to cover all of the window opening from the inside on a single side of the 'building'. I cover one side of the cardboard sheet with fabric (either scrap canvas or some other fabric).

In the past I would make a fabric-wrapped piece of cardboard for each window opening. Not only was this time-consuming, but it radically increased the chances of getting burned by hot glue. 10 individual window panels = 10 chances to accidentally squeeze out molten Armageddon on my fingers vs. one large window panel = 1 chance to cauterize my flesh. As an added bonus, when I fill the buildings with spray foam, the single sheet of fabric-wrapped cardboard creates substantially fewer opportunities for the foam to push its way out.
I lay down hot glue circling all of the window openings to insure a good adhesive bond (and to form a seal that protects against spray foam leaks).

I carefully press the cardboard into place.

POW! After 10 minutes of fiddling around, I have sealed off window openings on one side of the building. I follow this up by using canvas/fabric to hold the edges of the building into shape. It actually takes longer to reseal the edges/cracks of the building than it does to seal off the windows.

I use a small bead of adhesive caulk around the edges of the windows to further protect against spray foam leaks and to clean up the exposed corrugated edges of the cardboard.

Then I use I Popsicle stick (I think they are technically called 'craft sticks') to smooth out the edges, push the caulk into the corrugation, and scrape away the excess caulk around the edges.

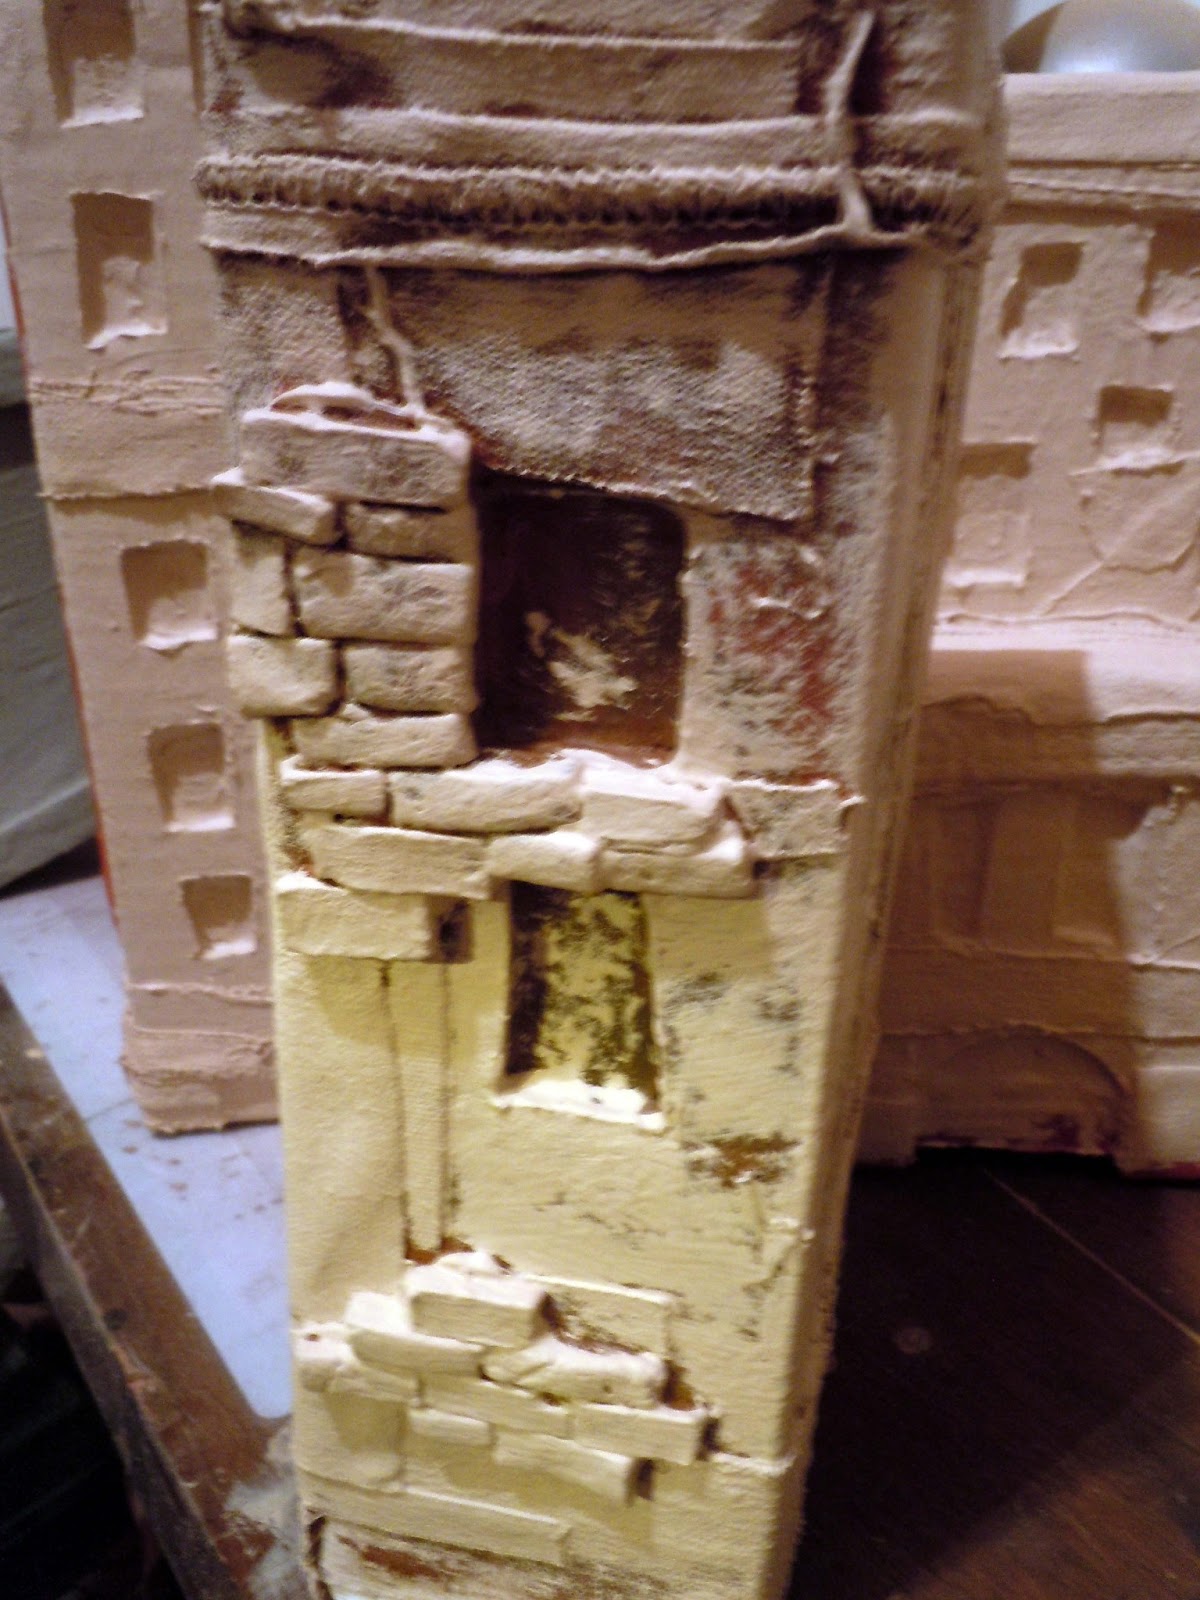
Several years ago I filled a box with small ceramic bricks that I cut out from scrap slabs of clay and bisque fired. The time has come to once again call them into service.

Covering the entire exterior would be counter productive. By applying small passages of bricks in selected areas, the bricks suggest a brick exterior, but don't actually make one. It is a physical/3-dimensional way to do what comic books do so nicely when they want to create a shorthand for a brick wall.


One side completed before priming. Note on the side nearest my palm you can see the corrugation of the cardboard in several windows that have yet to be 'edged' with caulk.

I'm starting to amass enough buildings to get a sense of how things might look for the completed piece.

I want to get at least one, if not two, layers of paint on the buildings before I fill them with spray foam. I had a little bit of brown left over in a paint can and once it was gone I started using an obnoxious orange color.

The buildings will get a more thorough surface treatment once I have them foamed and the bases sealed up.

Here is the start of filling the inside of a building with spray foam. I usually put the last little bit from each can into a building so I don't waste the foam. It may take 5-6 cans worth of 'scrap' to fill one building.

In addition to making buildings, I am also going to need to make signs.


The process is similar to making a flight stairs. I need a front, a back, and spacers. Instead of individual treads like I would have for stairs, I have long rectangular strips which follow the contours of the sign.

Edging the sign with strips of denim from a pair of jeans that just wasn't up to the challenge.


Once the spacer is edged with denim, it's time to cover the sides with scrap canvas. I don't mind using small scraps of canvas and having several seams. Once it has a few layers of paint (and some Spackle) the seams will contribute to a nice surface texture.


After I have applied two coats of paint (to firm up the structure and to insure that I have sealed up as many holes as possible), it is time to add the spray foam. Typically one can of foam can be used inside multiple structures, so I find it is best to have several ready so I can deplete the contents of the spray foam can in one use. Spray foam typically comes with just one spray nozzle, and once that one is plugged, you have to steal a nozzle from another can (whose contents you must also use up otherwise you have a can with no nozzle (a vicious cycle, really).


Any proper metropolis needs a multitude of arrow/signs pointing at things.


Some more signs in progress.

All said and done, I think I will need roughly 40-50 buildings and around 30 signs. I have a long (but fun) road ahead of me between now and August.

Seeing this arrow gives me an idea......
thank you for sharing this blog. It has a lot of meaningful information. I wish if i could get some more information on this. Take care! plastic molding we provide wide range of customer rubber products such as grommet, o ring, washers, bushings, available in solid and sponge.
ReplyDelete